How to Diagnose and Repair a Leaking Frost-Proof Spigot
When the chill of winter sets in, homeowners rely on frost-proof spigots to keep their outdoor water access functional and free from freezing damage. However, even these specialized faucets can develop leaks, leading to water waste and potential property damage.
In this article, we’ll explain how you can diagnose what’s causing the leaking issue and how you can repair it yourself. Let’s begin.

How Frost Proof Spigot System Works
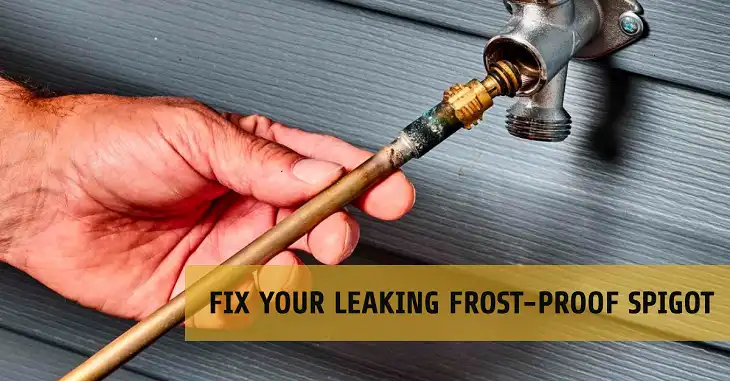
Frost proof spigots, also known as freeze-proof faucets, are a marvel of simple yet effective engineering. Unlike standard outdoor faucets, these devices feature an elongated stem that extends 4 to 24 inches into the warmth of your home. This design allows the actual water shutoff to occur well inside the heated space, preventing water from remaining in the exposed portion of the pipe where it could freeze and cause damage.
The typical frost proof spigot consists of several key components:
1. A long stem (usually brass or copper)
2. An internal washer or cartridge at the end of the stem
3. A vacuum breaker to prevent backflow
4. A handle for operation
When you turn off a frost proof spigot, water drains out of the long stem, leaving no water to freeze in the exposed portion of the faucet. This ingenious design can protect pipes from freezing in temperatures as low as -10°F (-23°C), making them ideal for colder climates.
Diagnosing a Leaking Frost Proof Spigot
When faced with a leaking frost proof spigot, the first step is to identify the source and type of leak. This process requires careful observation and sometimes a bit of detective work.
Start by fully opening the faucet and then closing it tightly. Observe where water is escaping:
- If water drips from the spout when the handle is off, the internal washer or cartridge may be worn.
- Leaks around the handle often indicate a loose packing nut or worn O-ring.
- Water seeping from the vacuum breaker (usually located just behind the handle) suggests a faulty anti-siphon device.
For a more thorough inspection, you’ll need a few basic tools:
- Adjustable wrench
- Screwdriver set
- Pliers
- Flashlight
Carefully examine all visible parts of the spigot, including connections and seals. Look for signs of corrosion, cracks, or loose fittings. In some cases, you may need to partially disassemble the faucet to pinpoint the exact source of the leak.
Common Causes of Frost Proof Spigot Leaks
Understanding the root causes of leaks can help you address the problem more effectively. Here are the most frequent culprits:
1. Worn Washers: The internal washer, typically made of rubber, can deteriorate over time. This is the most common cause of spout leaks.
2. Loose Packing Nuts: The packing nut around the stem can loosen with use, allowing water to escape around the handle.
3. Damaged O-rings: These small rubber rings create seals at various points in the faucet and can wear out or become brittle.
4. Faulty Vacuum Breakers: If the anti-siphon device fails, it can cause leaks and potentially allow contaminants into your water supply.
5. Cracked Stems: While less common, the long stem can crack due to freezing or physical damage.
6. Improper Installation: If the spigot wasn’t installed with the correct downward slope, water may not drain properly, leading to freezing and damage.
How to Repair A Leaky Frost-Proof Spigot: Step-by-Step
Many frost proof spigot leaks can be repaired with basic tools and a bit of know-how. Here’s a guide to common repairs:
Step 1: Shut off the water supply
Begin by locating the main water shut-off valve for your home. This is typically found in the basement, crawl space, or near the water meter. Turn the valve clockwise until it’s fully closed to completely shut off the water supply to your home.
Step 2: Open the spigot
Next, go to the leaking spigot and turn the handle to fully open it. This will release any water remaining in the pipe and relieve pressure, making the repair process easier and less messy.
Step 3: Remove the handle
Examine the handle of the spigot to find a small screw, usually located on the side or top. Using the appropriate screwdriver (Phillips or flathead), remove this screw. Once the screw is out, you should be able to pull the handle off the stem easily.
Step 4: Unscrew the packing nut
With the handle removed, you’ll see the packing nut just behind where the handle was situated. Take an adjustable wrench and position it on the nut. Turn the wrench counterclockwise to loosen and remove the packing nut.
Step 4: Extract the stem assembly
Now that the packing nut is removed, you can access the stem assembly. Grab the exposed stem with a pair of pliers and pull it straight out of the spigot body. You might need to wiggle it gently to work it free, but it should come out without too much resistance.
Step 5: Inspect and replace the washer
At the end of the stem, you’ll find the washer. Examine it closely for any signs of wear, cracks, or damage. If it looks worn, use a flathead screwdriver to carefully pry off the old washer. Replace it with a new washer of the same size and type.
Step 6: Check and replace O-rings
Look along the stem for rubber O-rings. These can deteriorate over time, so check them for cracks, wear, or deformation. If you spot any damage, remove the old O-rings and replace them with new ones of the same size.
Step 7: Clean the valve seat
The valve seat is located inside the spigot body where the washer makes contact. Use a small wire brush or a cloth to clean away any debris or mineral deposits that may have accumulated. While cleaning, inspect the seat for any damage or irregularities.
Replace damaged valve seat (if necessary): If you find that the valve seat is damaged, you’ll need to replace it. Use a seat wrench of the correct size, inserting it into the spigot body. Turn counterclockwise to remove the old seat, then install a new one by turning clockwise with the wrench.
Step 8: Lubricate components:
Before reassembly, apply a thin layer of silicone-based plumber’s grease to the new washer and O-rings. This lubrication helps create a better seal and makes the installation process smoother.
Step 9: Reassemble the spigot
Carefully insert the stem assembly back into the spigot body. Make sure it’s aligned correctly and slides in smoothly without forcing it.
Thread the packing nut back onto the spigot body. Use your wrench to tighten it, but be careful not to over-tighten. The nut should be snug but still allow the stem to turn freely.
Place the handle back onto the stem, ensuring it’s aligned correctly. Reinsert the screw you removed earlier and tighten it securely with your screwdriver.
Step 10: Test the repair
Return to your main water supply and slowly turn it back on. Once the water is flowing, go back to the spigot and open it gradually. Check for any leaks around the handle, packing nut, and spout. Test the spigot in both fully open and closed positions.
If you still notice leaks after completing these steps, go back and double-check all your repair work. Ensure all components are properly seated and tightened. If problems persist despite your best efforts, it may be time to consider replacing the entire frost-proof spigot unit.
Other Frequent Questions
How do you defrost a spigot?
Turn off the interior water valve. Apply gentle heat with a hair dryer or heating pad to the exterior part of the spigot. Start from the house end and work outward. Never use an open flame. Once thawed, check for leaks.
Why does my frost-free faucet leak from the weep hole?
This usually indicates a worn washer or seat inside the faucet. The faucet isn’t closing fully, allowing water to flow through the pipe and out the weep hole. You’ll need to disassemble the faucet and replace worn parts.
How do you insulate a frost-free faucet?
Use a foam faucet cover from a hardware store. Ensure the area is dry before installing. For extra protection, wrap the exposed pipe with foam insulation or heat tape before adding the cover. Remove attached hoses before winter.
What is the difference between frost-proof and frost-resistant?
Frost-proof spigots have a long stem extending into the heated area of your home, allowing water to drain when turned off. Frost-resistant faucets have some freeze-prevention features but lack the long-stem design and are less reliable in extreme cold.
Bottom Line
Frost proof spigots are an essential component of many homes, providing reliable outdoor water access even in freezing conditions. By understanding how these devices work, recognizing common issues, and performing regular maintenance, homeowners can ensure their frost proof spigots remain functional for years to come. Whether you’re tackling a DIY repair or calling in a professional, addressing leaks promptly will save water, money, and potential headaches down the road. Remember, a well-maintained frost proof spigot is not just a convenience—it’s an investment in your home’s plumbing system and overall water efficiency.


