How to Identify and Troubleshoot a Leaky Faucet?
A leaky faucet may seem like a minor nuisance, but it can have significant environmental and economic impacts if left unaddressed. According to the Environmental Protection Agency (EPA), a single leaky faucet dripping at the rate of one drip per second can waste up to 3,000 gallons of water per year. That’s enough water to fill a backyard swimming pool! Furthermore, this wasted water translates into higher utility bills, costing households hundreds of dollars annually.
Identifying and addressing leaky faucets promptly is crucial for reducing water waste, lowering utility costs, and preventing potential damage to your home. This article will provide you with the knowledge and tools to detect leaks early, understand their causes, and take appropriate action to resolve the issue.
Different Types of Faucet Leaks and What Causes Them
Faucet leaks can occur in various forms, each with its own distinct characteristics and causes. Understanding these types and their underlying reasons is essential for effective troubleshooting and repair.
- Dripping from the Spout: This is the most common type of leak, where water drips from the faucet’s spout, even when it’s turned off. It is often caused by worn washers or seals that fail to create a tight seal, allowing water to seep through.
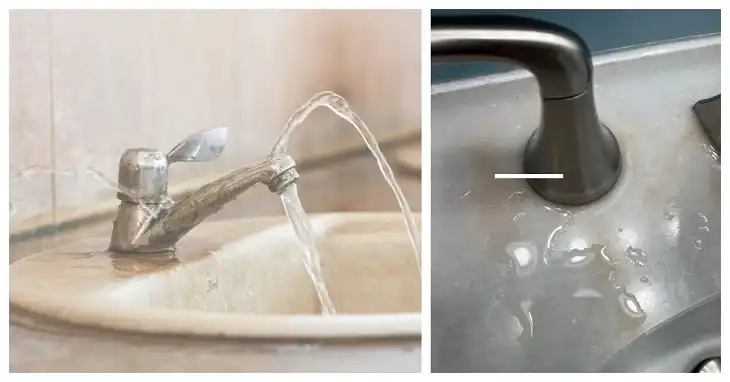
- Base Leaks: In this type of leak, water accumulates around the base of the faucet, often indicating a problem with the valve stem or the faucet’s connection to the sink or countertop. Loose fittings, corroded valves, or mineral buildup can contribute to base leaks.
- Spraying Leaks: These leaks occur when water sprays from the faucet’s handle or base, rather than dripping. This type of leak typically indicates a more severe issue, such as a damaged valve or a cracked faucet body, which requires immediate attention.
Common causes of leaky faucets include worn washers or seals, corroded valves, loose connections, and mineral buildup from hard water. As faucets age, their components can degrade, leading to leaks over time.
How to Identify Leaky Faucets: A Complete Checklist
Detecting a leaky faucet may seem straightforward, but some signs are more subtle than others. To ensure you catch leaks early, it’s essential to conduct a thorough inspection using a comprehensive checklist.

Visual Indicators
- Dripping water from the spout: This is the most obvious sign of a leaky faucet. Pay attention to different dripping patterns, as they can provide clues about the underlying issue. For example, a steady drip may indicate a worn washer, while an intermittent drip could signify a partially clogged aerator.
- Pooling water around the base: If you notice water accumulating around the base of the faucet, it’s likely a sign of a base leak. This type of leak can be more difficult to detect and may require a closer inspection.
- Water stains or mineral deposits: Discoloration or mineral buildup on the faucet, sink, or surrounding areas can indicate a long-standing leak. Different materials, such as porcelain or stainless steel, may exhibit varying signs of water damage or mineral deposits.
- Corrosion or rust: Over time, leaks can cause corrosion or rust to develop on the faucet body or other metal components. This can weaken the faucet’s structure and increase the risk of more severe leaks.
- Warped or damaged cabinet/area underneath the sink: If the cabinet or area beneath the sink shows signs of warping, discoloration, or mold growth, it could be a result of long-term moisture exposure from a leaky faucet.
Auditory Cues
- Constant dripping sound: Even when you can’t see water dripping, a persistent dripping sound can be a telltale sign of a leaky faucet. Pay close attention to this sound, especially at night when background noise is minimal.
- Sputtering, hissing, or knocking noises: These sounds can indicate air pockets or obstructions in the water lines, which may be caused by a leak or faulty valve.
Water Usage Anomalies
- Unexpected increase in water bills: If your water bill shows a sudden and unexplained spike in usage, it could be a sign of a leaky faucet or another plumbing issue.
- Running water meter when no fixtures are in use: Conduct a simple test by turning off all water-using appliances and fixtures in your home, then check your water meter. If the meter is still running, it’s likely that you have a leak somewhere in your plumbing system, including a leaky faucet.
Performance Issues
- Difficulty turning the faucet handle: If you experience resistance or stiffness when trying to turn the faucet handle, it could be an indication of a leak or mineral buildup inside the faucet mechanism.
- Loose or wobbly faucet: A loose or wobbly faucet can be a sign of a base leak or a compromised connection between the faucet and the sink or countertop.
- Reduced water pressure: While low water pressure can have various causes, a leaky faucet can contribute to this issue by allowing water to escape before reaching the spout.
Indirect Signs
- Musty odors: If you notice a persistent musty odor around the faucet area, it could be a sign of mold or mildew growth due to excess moisture from a leak.
- Peeling paint or wallpaper: Water damage from a leaky faucet can cause paint or wallpaper to peel or bubble in the surrounding areas.
By carefully inspecting your faucet for these visual, auditory, and performance-related signs, you can catch leaks early and take appropriate action to prevent further water waste and potential damage.
How to Troubleshoot a Leaky Faucet
Once you’ve identified a potential leak, the next step is to isolate its source for effective troubleshooting and repair. Here’s a step-by-step guide to help you:
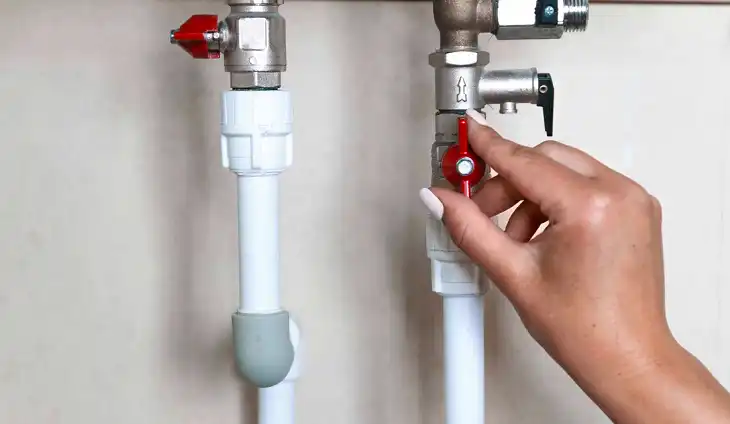
- Shut off the water supply: Locate the shutoff valves under the sink or near the main water supply line. If you have a single-handle faucet, there will likely be two shutoff valves – one for hot water and one for cold water. Turn these valves clockwise to shut off the water supply to the faucet.
- Check if dripping stops: Once the water supply is shut off, observe the faucet for a few minutes. If the dripping stops, it indicates that the leak is coming from the faucet itself, and not from the water supply lines.
- Identify the source of the leak: If the dripping continues even after shutting off the water supply, the leak may be coming from the supply lines or other plumbing components. In this case, it’s best to seek professional assistance from a licensed plumber. If the dripping stops, you can proceed with isolating the leak source within the faucet.
For single-handle faucets, turn the handle to the on position and observe where the leak is coming from – the spout, the handle, or the base. For double-handle faucets, repeat the process for each handle to determine the source of the leak.
By following these steps, you can effectively isolate the location of the leak, which will guide you in determining the appropriate repair method or the need for professional assistance.
How to Fix A Leaky Faucet
If you’ve identified a leak coming from the faucet itself, there are several DIY repair options you can consider, depending on the type of faucet and the specific issue. However, it’s important to exercise caution and follow safety precautions when attempting any DIY repairs.
Tightening the Faucet Handle: For leaks originating from the faucet handle, a simple solution may be to tighten the handle’s setscrew or mounting nut. Consult the manufacturer’s instructions or refer to online video tutorials for your specific faucet model. Be careful not to overtighten, as this can damage the components.
Replacing a Worn Washer (for Compression Faucets): If the leak is coming from the spout of a compression faucet, the likely culprit is a worn washer or seal. Replacing the washer is a relatively straightforward process, but it requires identifying the correct washer type and size for your faucet.
Here’s a step-by-step guide:
- Turn off the water supply and remove the faucet handle.
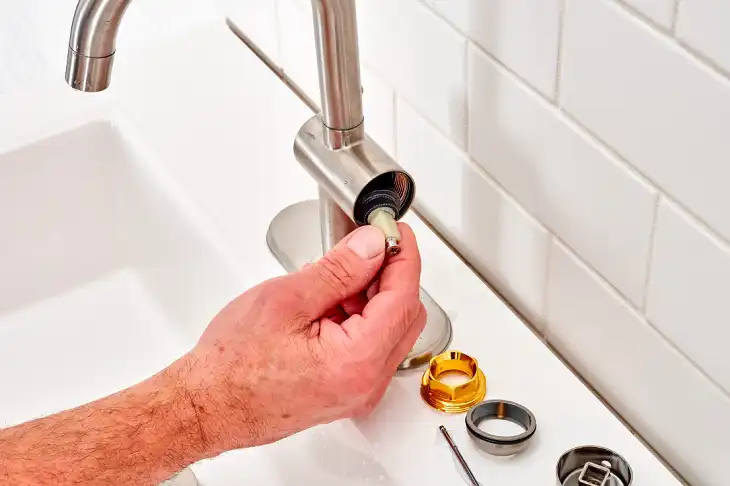
- Use pliers or a faucet socket wrench to unscrew the stem, taking care not to damage the finish.
- Remove the old washer and inspect the valve seat for any buildup or damage.
- Clean the valve seat with a mild abrasive, such as emery cloth or a valve seat dresser.
- Install the new washer, ensuring it’s seated properly.
- Reassemble the faucet, tightening the components securely but not excessively.
- Turn on the water supply and check for leaks.
It’s important to note that while DIY repairs can save you money, they also come with risks. Always follow safety precautions, such as turning off the water supply, protecting surfaces from water damage, and using the appropriate tools. If you encounter any difficulties or are unsure about the repair process, it’s best to consult a professional plumber.
When to Call a Professional Plumber
While some leaks can be addressed with DIY repairs, there are situations where professional assistance is recommended or necessary. Knowing when to call a plumber can save you time, money, and potential headaches in the long run.
Seek professional help if you encounter any of the following scenarios:
- Complex Leaks: If you’re dealing with a spraying leak or a base leak, it’s often an indication of a more complex issue, such as a damaged valve or a cracked faucet body. These types of leaks can be challenging to diagnose and repair without professional expertise.
- Cartridge or Valve Replacements: Modern faucets, particularly those with ceramic disc valves or cartridge systems, may require specialized knowledge and tools for valve replacements. Attempting these repairs on your own can lead to further damage or leaks if not done correctly.
- Fixture Compatibility: If you’re considering replacing an old faucet, a professional plumber can ensure that the new fixture is compatible with your existing plumbing setup and properly installed to prevent future leaks.
- Aging Plumbing Systems: If your home has an older plumbing system or if the leaks persist despite your efforts, it may be time to consult a plumber for a more comprehensive evaluation and potential system upgrades.
When choosing a professional plumber, look for licensed and insured contractors with positive user feedback or reviews.