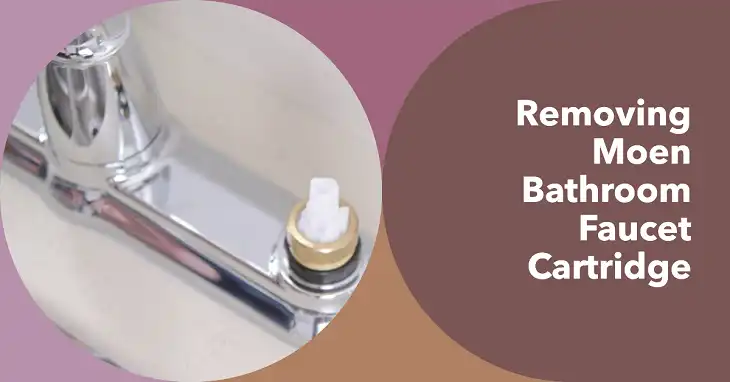
How to Remove & Replace Moen Bathroom Faucet Cartridges
If you’re looking to fix a leaky faucet or improve water flow in your bathroom, replacing the cartridge in your Moen faucet is a common solution. This guide will walk you through the steps for removing and replacing different Moen bathroom faucet cartridges, with particular emphasis on the 1200 and 1225 models.
What Tools Do I Need to Replace a Moen Faucet Cartridge?
Before you start, make sure you have the following tools on hand:
- Adjustable wrench or channel locks
- Phillips and flathead screwdrivers
- Needle-nose pliers
- Cartridge puller (optional but helpful)
- Plumber’s grease
How Do I Identify Which Moen Cartridge I Need to Replace?
Moen offers several cartridge models, so it’s essential to know which one fits your faucet. Common Moen cartridges include:
- 1200 Cartridge: A brass single-handle cartridge, used in Moen faucets produced prior to 1981.
- 1225 Cartridge: This is the updated version of the 1200, made from plastic but functioning similarly.
- 1222 Cartridge: A replacement for Moen Posi-Temp faucets, usually found in shower valves.
You can confirm which cartridge your faucet requires by checking your faucet manual or using Moen’s online Faucet Identifier Tool.
Step-by-Step Guide to Replacing a Moen Faucet Cartridge
Step 1: Turn Off the Water Supply
Before doing anything, shut off the water supply to your faucet to prevent any water from flowing while you work. Typically, you’ll find shut-off valves under the sink. Turn these clockwise to close them, then open the faucet to relieve any water pressure.
Step 2: Remove the Handle
Locate the set screw holding the faucet handle in place. This is usually found behind the handle or beneath a decorative cap. Use a Phillips or flathead screwdriver to remove the set screw, then gently pull the handle off.
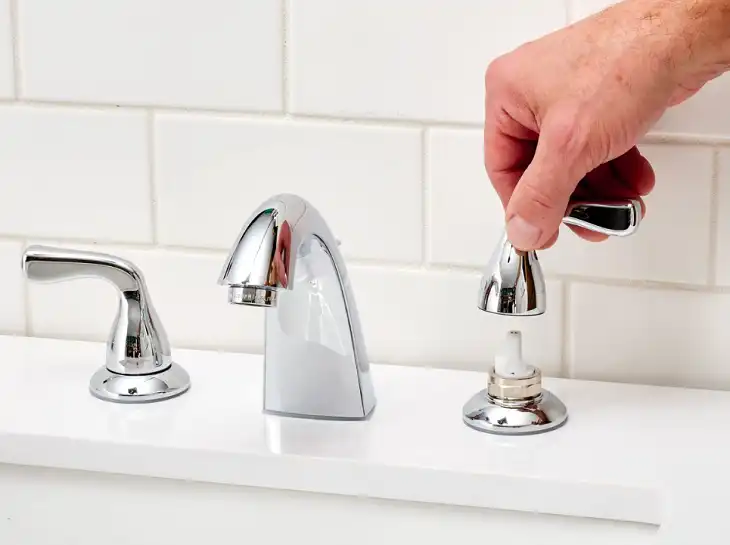
Step 3: Detach the Retainer Clip
Next, remove any retainer clip or pin that secures the cartridge in place. In most cases, this clip is located at the top of the cartridge housing. Use needle-nose pliers to pull the clip out. Be sure to set it aside, as you’ll need it when reinstalling the new cartridge.
Step 4: Extract the Cartridge
To remove the old cartridge, grab it with an adjustable wrench or use a cartridge puller for stubborn models. Turn the cartridge back and forth while pulling it up and out of the faucet body. You might need to exert some force here, especially if it’s been in place for many years.
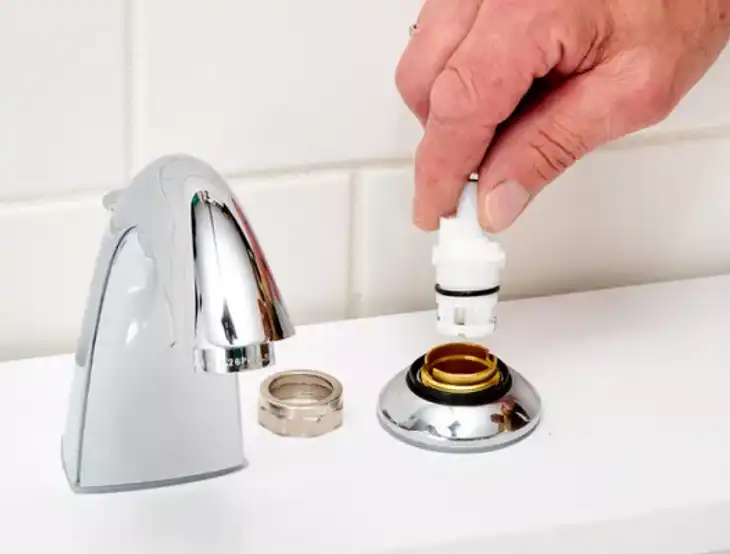
Step 5: Prepare and Install the New Cartridge
Before inserting the new cartridge, coat it with a thin layer of plumber’s grease. This will help with the installation and ensure smooth operation. Align the cartridge tabs with the slots inside the faucet, and press it down into place.
Step 6: Reattach the Retainer Clip and Handle
Insert the retainer clip or pin back into its original position, securing the cartridge in place. Then, reinstall the faucet handle by tightening the set screw.
Step 7: Turn the Water Supply Back On
Turn the water supply back on by opening the shut-off valves. Finally, test the faucet to ensure that everything works correctly and that the leak has been fixed.
Additional Information for Some Unique Moen Faucet Models
Moen 1225 Cartridge
The Moen 1225 cartridge is an updated version of the 1200, often made of plastic, and it functions similarly in single-handle faucets. To replace the 1225 cartridge, follow the steps mentioned above. If you’re working with older brass cartridges, you may encounter more difficulty in removing them due to corrosion.
Moen Posi-Temp 1222 Cartridge
If your bathroom uses a Moen Posi-Temp shower faucet, you’ll need the 1222 cartridge, which operates slightly differently. The removal process is similar, but since the 1222 cartridge controls temperature and pressure, ensure it’s correctly aligned when reinstalled to avoid hot water issues. You can find more details in Moen’s cartridge replacement tutorials.
What to Do if the Cartridge is Stuck?
If your cartridge is stuck, especially in older faucets, a cartridge puller can make removal easier. This tool hooks onto the cartridge and helps lift it out by applying even pressure. If you don’t have a puller, you can try wiggling the cartridge back and forth with pliers to loosen it. Be careful not to damage the faucet body during removal.
Should I Use Plumber’s Grease When Replacing a Moen Cartridge?
Yes, applying a small amount of plumber’s grease to the O-rings and seals on the new cartridge can help it seat properly and prevent leaks. This also makes it easier to remove the cartridge in the future.
Why is My Faucet Still Leaking After Replacing the Cartridge?
If you’ve replaced the cartridge and your faucet is still leaking, double-check the installation. Ensure the cartridge is properly seated and that the retainer clip is fully engaged. If the problem persists, inspect the O-rings and seals around the cartridge, as they might need replacement.
FAQs
Can I use any replacement cartridge, or does it need to be a Moen-specific part?
It’s highly recommended to use a genuine Moen replacement cartridge for your specific faucet model. Using non-Moen parts may result in compatibility issues, leaks, or premature failure.
How often should I replace the cartridge in my Moen faucet?
There is no set timeline for cartridge replacement, as it depends on factors like water quality, usage frequency, and overall wear and tear. However, it’s generally advisable to replace the cartridge if you notice any leaks, reduced water flow, or difficulty in adjusting the temperature.
Can I reuse the old cartridge nut or clip when installing the new cartridge?
While it’s possible to reuse these components, it’s always best to use the new nut or clip that comes with the replacement cartridge. Reusing old parts may compromise the seal and lead to future leaks or issues.
Summary
Replacing a Moen bathroom faucet cartridge is a manageable DIY task that can save you money on professional plumbing services. Whether you’re dealing with a leaky faucet or a broken cartridge, following these steps will help restore your faucet’s function. Remember to consult Moen’s official resources for specific models and detailed instructions, especially for faucets like the Posi-Temp that require particular care.