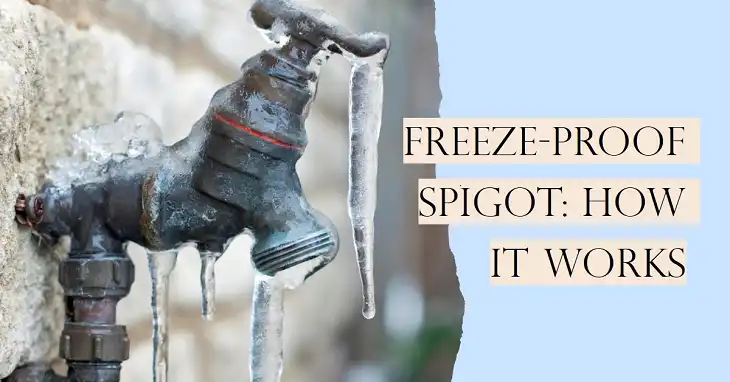
How to Fix a Leaky Outdoor Frost Free Faucet
A leaky outdoor frost-free faucet can be a frustrating and wasteful problem, leading to increased water bills and potential water damage. Fortunately, fixing it yourself is often a straightforward task that can save you the cost of hiring a plumber. In this guide, we’ll walk you through the process of identifying and resolving common causes of a leaky frost-free faucet, ensuring your outdoor water supply is functioning efficiently and without costly leaks.
Why Your Outdoor Frost-Free Faucet Is Leaking?
A leaky frost-free faucet can have several underlying causes, ranging from worn-out washers and O-rings to loose or damaged packing materials. Understanding these common culprits is essential for effective troubleshooting and repair.
Worn-out washer or O-ring: Over time, the washers and O-rings responsible for sealing the faucet can wear down, leading to leaks. Replacing these inexpensive components is often the simplest solution.
Loose packing nut: The packing nut secures the stem of the faucet and prevents leaks. If it becomes loose, water can seep through, causing a leak.
Damaged packing material: The packing material surrounding the faucet stem can deteriorate due to age, exposure to the elements, or constant friction, resulting in leaks.
Leaks from the handle: A loose packing nut or worn packing material can cause water to leak from the handle area.
Leaks from the spout: Worn washers at the valve stem are typically responsible for leaks coming from the faucet’s spout.
Loose retaining nut: The retaining nut holds the faucet stem in place. If it becomes loose, it can cause leaks.
Vacuum breaker issues: The vacuum breaker is a crucial component that prevents backflow. Worn or clogged parts within the vacuum breaker can contribute to leaks.
What Tools and Materials Are Needed to Fix Your Leaky Outdoor Frost-Free Faucet?
Before stepping into the repair process, ensure you have the necessary tools and materials at hand. Here’s a list of what you’ll need –
- Screwdriver (flat-head and Phillips-head)
- Adjustable wrench or pliers
- Small screwdriver, pick, or knife (optional for accessing tight spaces)
- Replacement washers and O-rings (matching the size and thickness of the existing ones)
- Replacement vacuum breaker parts (if necessary, based on the condition of the existing parts)
- Plumber’s tape (optional for reassembly, to ensure a tight seal).
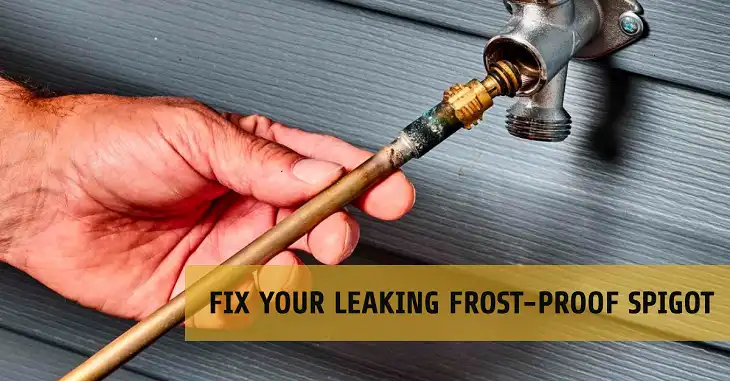
How Do You Fix a Leaky Outdoor Frost-Free Faucet?
Fixing a leaky outdoor frost-free faucet can seem daunting, but by following a systematic approach, you can tackle the issue with confidence –
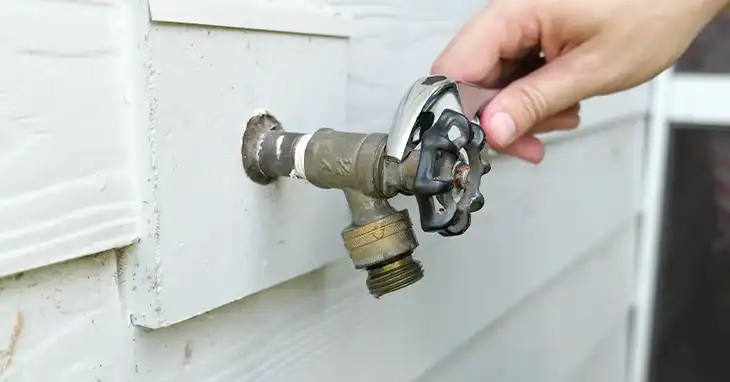
Turn Off the Water Supply
Before proceeding with any repair work, it’s crucial to turn off the water supply to the outdoor faucet. This step ensures your safety and prevents any additional water damage or mess during the repair process.
Locate the shutoff valve that controls the water supply to the outdoor faucet. This valve is typically located near the faucet or where the water line enters your home. Turn the shutoff valve clockwise to stop the flow of water to the faucet.
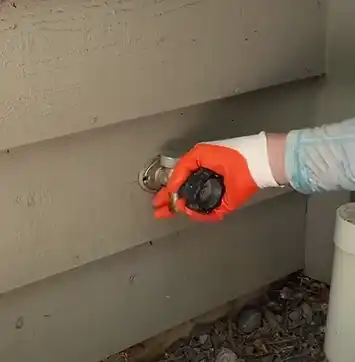
Once you’ve turned off the water supply, open the outdoor faucet to release any remaining water pressure and confirm that the water has been successfully shut off.
Check the Packing Nut
Then our next step in addressing a leaky frost-free faucet is to check the packing nut. This nut secures the stem of the faucet and prevents leaks. Locate the packing nut on your outdoor faucet.
Once you’ve identified the packing nut, use an adjustable wrench to tighten it by turning it clockwise. It’s recommended tightening the packing nut by 1/2 to 1/8 of a turn. If your faucet has a handle screw, tighten that as well using a screwdriver.

Remove the Handle and Packing Nut
If tightening the packing nut doesn’t resolve the leak, you can now proceed to disassemble the faucet to access the internal components. Start by removing the handle from the faucet.
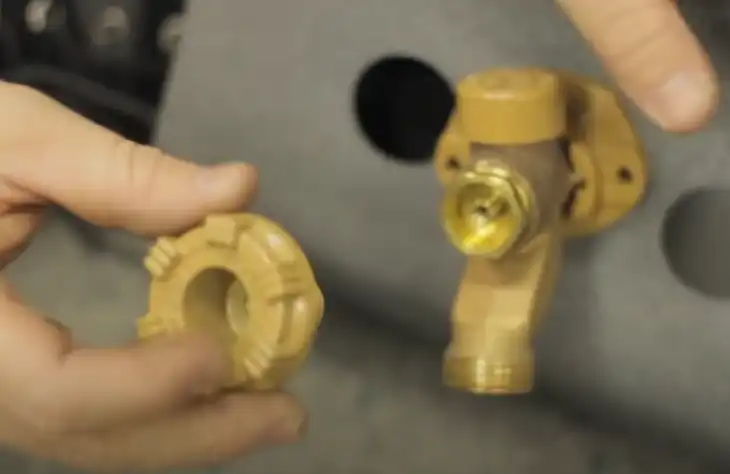
If your faucet has a handle screw, use a screwdriver to loosen and remove it. Gently pull the handle off the faucet stem.
Next, use an adjustable wrench or pliers to loosen and remove the packing nut. This nut secures the faucet stem and packing material in place. Turn the packing nut counterclockwise to loosen and remove it from the faucet body.
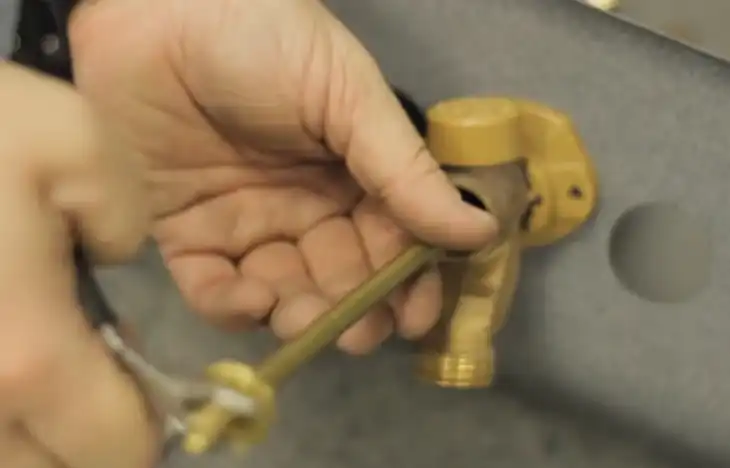
Access and Replace the Washer Assembly
The process for accessing and replacing the washer assembly differs slightly between regular spigots and frost-free faucets.
In a frost-free faucet, the washer assembly is located at the opposite end of the faucet stem. You’ll need to remove the entire stem to access the washer.
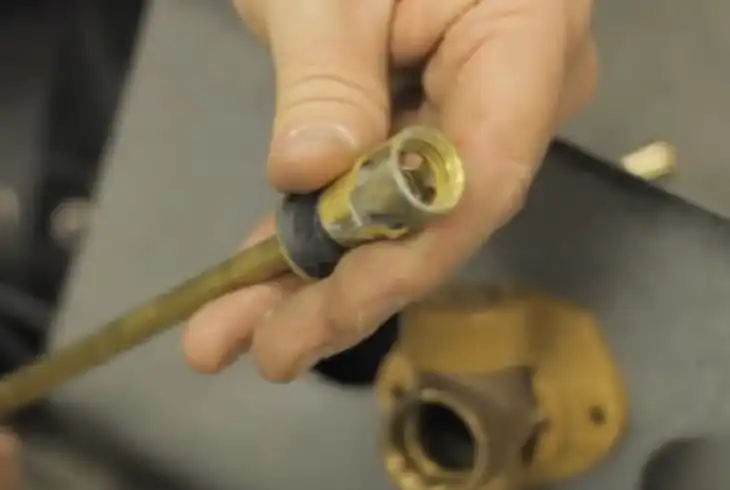
Once the stem is removed, locate the washer at the opposite end and replace it with a new one that matches the size and thickness of the old washer.
Replace the Vacuum Breaker
The vacuum breaker is a crucial component that prevents backflow and potential contamination of the water supply. If the leak seems to be originating from the vacuum breaker area, it may be necessary to inspect and potentially replace its internal parts.
Begin by removing the vacuum breaker cap using a screwdriver or pliers, depending on the design of your faucet. Inspect the internal parts of the vacuum breaker for wear, damage, or clogs.
If the parts appear to be in good condition, try cleaning them thoroughly with a small brush or compressed air. However, if the parts are visibly worn or damaged, it’s best to replace them with new parts.
Use the old parts as a reference when sourcing replacement vacuum breaker components to ensure a proper fit. You can consult assistance from a hardware store if you’re unsure about the correct replacement parts.
Reassemble Your Outdoor Frost-Free Faucet
After completing the necessary repairs, it’s time to reassemble the faucet and restore the water supply. Follow these steps to properly reassemble the faucet and test for any remaining leaks.
Step 1: If you replaced the washer assembly, carefully reattach it to the faucet stem or the appropriate location, ensuring a secure and proper fit.
Step 2: Reinsert the valve stem into the faucet body, turning it clockwise to secure it in place.
Step 3: Place the packing nut back onto the faucet stem and tighten it using an adjustable wrench or pliers. Turn the packing nut clockwise until it’s snug but not overtightened.
Step 4: If your faucet has a handle screw, replace the handle and secure it with the screw using a screwdriver. If there’s no screw, gently press the handle back onto the faucet stem.
With the faucet reassembled, it’s time to turn the water supply back on and test for any remaining leaks.
Restore the water supply to the faucet. Open the faucet to allow water to flow through and check for any leaks. Look for any water dripping or seeping from the packing nut, handle, spout, or vacuum breaker area.
If you notice any leaks, turn off the water supply again and repeat the repair process, ensuring that all components are correctly installed and tightened.
If no leaks are present, congratulations! You’ve successfully fixed your leaky outdoor frost-free faucet.
FAQs
Can I use plumber’s putty instead of washers and O-rings?
While plumber’s putty can provide a temporary seal, it’s not a long-term solution for outdoor faucets. Washers and O-rings are specifically designed to withstand the elements and provide a durable, watertight seal. Using plumber’s putty may lead to frequent leaks and the need for constant reapplication.
How often should I replace the washers and O-rings?
There’s no definitive timeline for replacing washers and O-rings, as their lifespan depends on various factors. However, it’s generally recommended to replace them every 2-3 years or whenever you notice signs of wear, such as cracks, brittleness, or deformation.
Can I use the same repair techniques for a standard outdoor faucet?
While some of the repair techniques may be similar, the specific steps and components involved can vary between standard outdoor faucets and frost-free faucets. Frost-free faucets are designed to prevent freezing by allowing water to drain back into the supply line when the faucet is turned off.